Piano Lessons, Scaramuzza Technique, Uncategorized
Wrist Movement
Oct
Wrist Movements and Anatomy
We will give a name to a movement based on the part of our body that moves and becomes responsible for actioning the keys. In the case of the wrist movements, in particular, this clarification becomes fundamental to understand how to produce this movement.
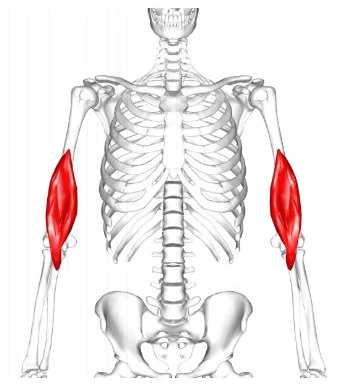
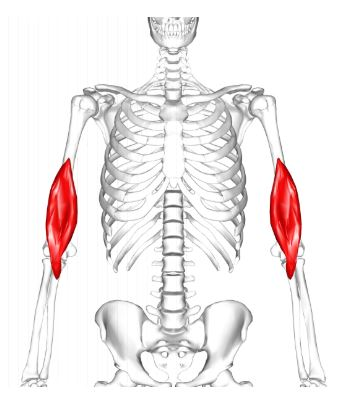
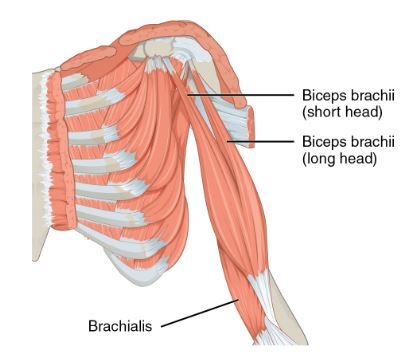
Even though the movements of the wrist are “seen” to be happening at a “wrist level,” the muscles responsible for moving the wrist are not located on the wrist. The muscle which is eminently in charge of the activation of the wrist movement -shaking- is the brachialis. The latter happens indirectly. The brachialis produces flexion of the elbow; it is this flexion of the elbow which moves the forearm which, at the same time, amplifies the movement as a lever compelling the wrist to move or shake. The biceps brachii, though far less involved in the wrist movement than the brachialis, play the critical role of stabilizing the upper arm through the movement, preventing it from bouncing while the brachialis is in action.
The creation
This movement needs us to understand it in two phases. The splitting of the teaching process occurs because it is tough to explain to a student how to control a movement from when it has already become spastic -automatic-.
Setting up the right position of the hand and wrist is fundamental. As the wrist needs to be “lifted.”
In that sense, we will structure the movement in two different and smaller elements. Firstly, a “negative” movement which involves flexing the wrist, so the fingers are set further from the surface of the keys. In order to avoid having to flex too much the wrist, it is important to place the forearm slightly higher above the keys than usual. The latter positioning creates an angle between the elbow, forearm, and key-surface that already sets the fingers naturally further away from the surface of the keys.
From this position is that we will start teaching the movement. We will first indicate the student to flex the wrist backward and sustain the weight of the arm on that position. From this position is that we will then ask the student to action forward, letting the wrist fall towards the keyboard with one finger pointing to the key we are interested in action. The “finish” of this movement is, as always, the same as in the “finger movement.” The weight of the arm will be then supported by the tip of the finger actioning the key -”stand-by” finger movement-. Once the student has understood the mechanics of the movement in slow motion, then the most critical part of the teaching process begins. The primary purpose of this training is to make the student understand that the movement can be effortless.
Now we need to ask the student to shake the hand. When using this movement, we need to feel how we can apply it even to long passages without feeling tired. Then we continue by explaining:
“Now we have felt how the wrist shakes freely by the action of the brachii and brachialis muscles -or upper arm-. Subsequently, we need to identify the negative movement and the active movement we have previously produced in a controlled way (when we let the hand fall freely back to the keyboard). Once we managed to see these two phases of the now spastic movement, then we try to direct the action towards one key on the keyboard.”
In the beginning, the result will be quite chaotic. For that reason, we need to focus on action one single note so the student can practice targeting.
https://www.youtube.com/watch?v=fDM_R7Y1xYk
Application
This movement is mainly intended to be used to play: staccato scales, notes, repeated notes in fast motion. It is also easy to texturize the movement by implemented regular or irregular accents.
#Scaramuzza #adultpianolessons #pianolessonsnearme #pianolessonsforadults #pianolessonsforbeginners